Showing posts with label tutorial. Show all posts

October 1, 2012

Corner Pocket Tutorial

Using corner pockets is my favourite method of hanging a mini quilt or wall-hanging besides having loops and a rod as part of the finished design. It is super easy, very functional and uses minimal hanging hardware on the wall. It has come to my attention lately that not everyone knows this little hanging trick so today I am happy to share it with all of you.


Materials needed:
fabric scraps
rotary cutter, ruler & mat
iron & ironing board
sewing machine
an unbound mini quilt or wall-hanging
binding
dowel cut to the correct length
push pin or small nails

Step 1: Cut two squares of fabric using your rotary cutter & ruler. I used 3-1/2" squares for this 9 x 12" wall-hanging and would suggest 4" or 5" squares on quilts up to 20" wide. Wider quilts will sag in the centre and need the extra support provided by a good old-fashioned hanging sleeve. Now most tutorials end once the sleeve is sewn on but this tutorial will explain how to actually hang the quilt on the wall.


Step 2: Press in half diagonally. It's important to only press and not slide the iron back & forth which will warp your squares because of the bias fold.


Step 3: Topstitch 1/8" from the folded edge. My machine loves to eat pointy bias corners. To prevent mangled points, start sewing on a small scrap that is butted up to the edge of your corner.


Step 4: Sew the pockets to the quilt. Make certain that you are sewing them to the back of the quilt at the top corners. However, if you feel like being more symmetrical you could add them to all four corners. There are others reasons you may want to add pockets to the bottom corners so please keep reading.


Step 5: Bind your quilt either by machine or by hand. I like to use single fold bias binding machine sewn to the front and attached by hand to the back using a blind stitch.


Step 6: Insert your dowel. As you can see here, a pencil was exactly the right size for my quilt but a chopstick or dowel cut to size will work too.


I wanted to incorporate the pockets into the quilt design so I added them to the bottom corners as well! This would also give you the option of hanging the quilt in any orientation. Adding another dowel or heavier rod at the bottom, will help to straighten a warped quilt.


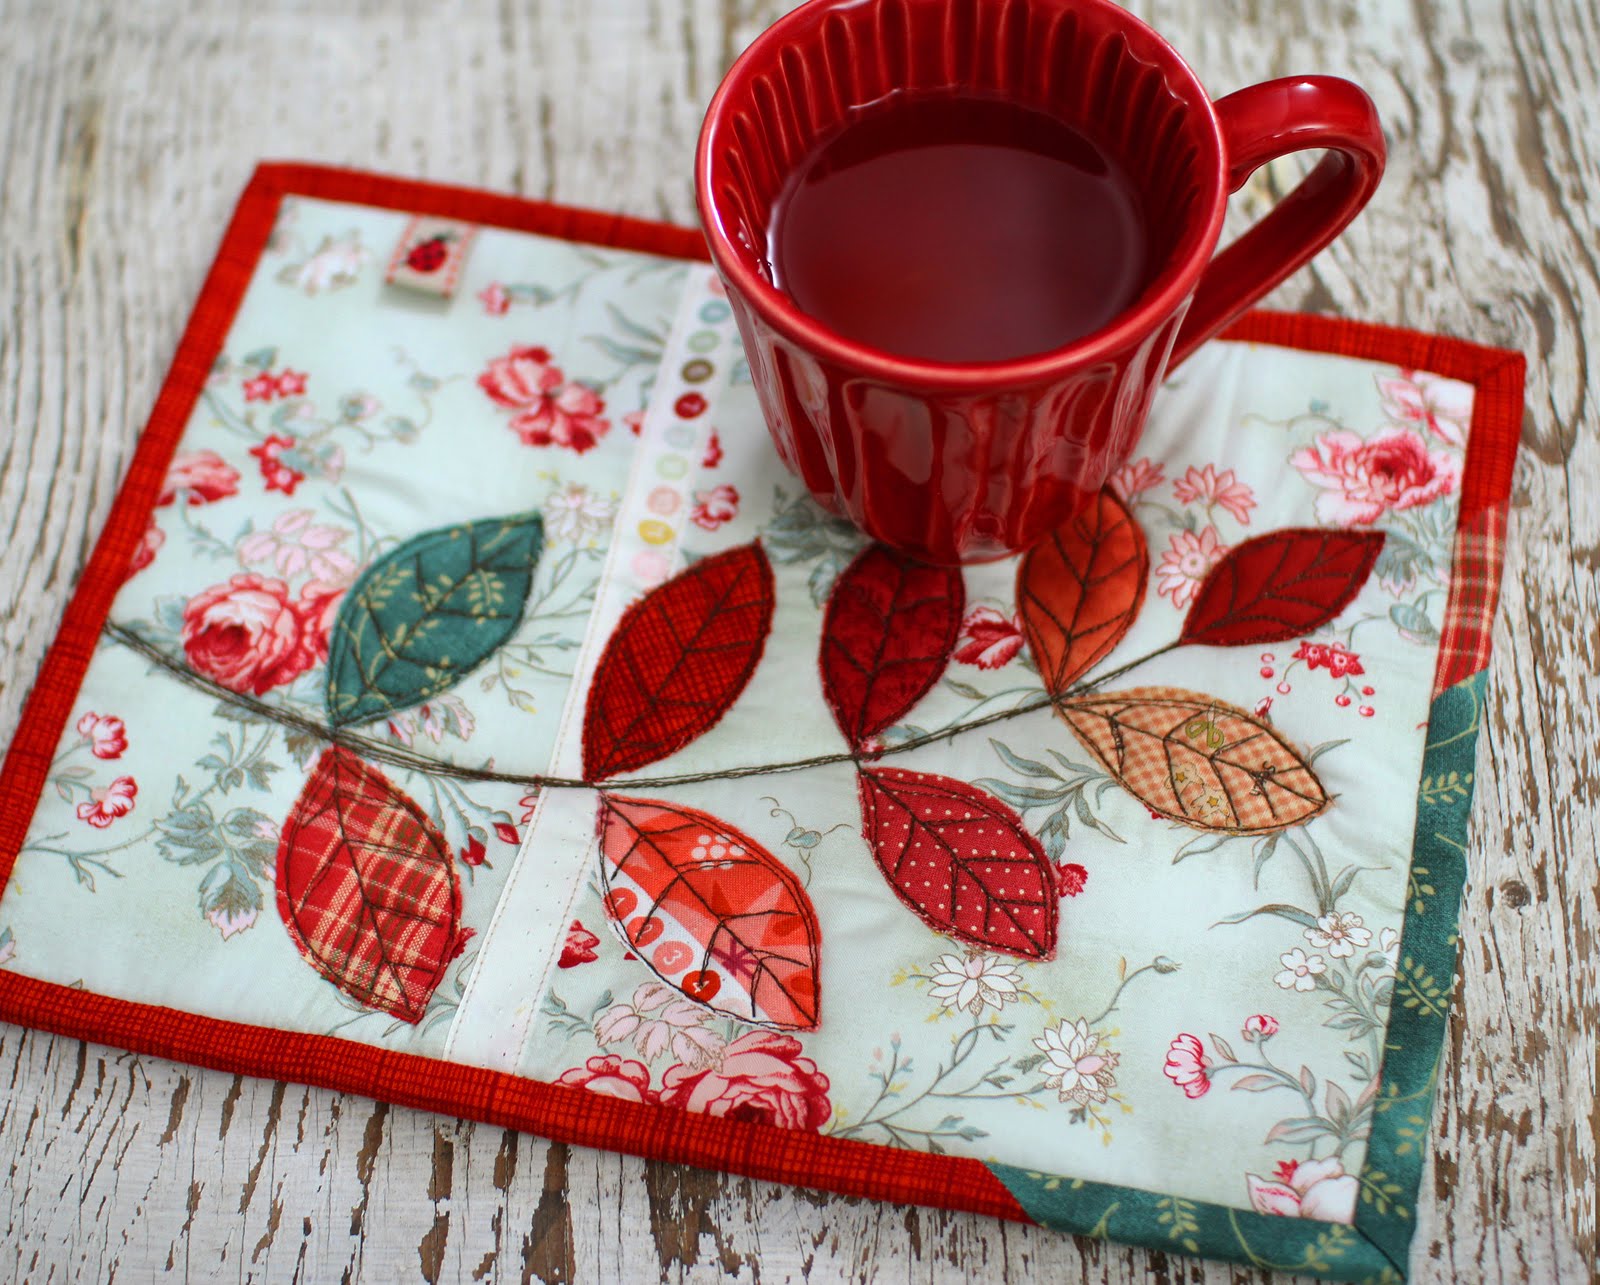
I usually just use a push pin to hang the quilt. If it is larger two push pins or small nails will work well and stop the quilt from being knocked off-kilter. For now I think I will use this little quilt as a mug rug because it looks fabulous with my red mug. Pretty soon I will have a rug for each & every mug I own!




Enjoy your afternoon tea & quilted crafts :o)

January 25, 2010

Coffee Staining Tutorial

I am a tea-a-holic (if you hadn't noticed already)! I never drink coffee but you will always find a tin of it in my fridge. Why? Well, although I do brew an occasional cup of coffee for my hubby, I use it mostly for staining fabric! Sometimes that perfect fabric for a project is hard to find especially when you are a perfectionist like me... this fabric is too white... that one is too bright... That's where coffee comes in.


I prefer fabrics and trims with a natural tone but sometimes they are hard to find. I will start with a fabric that has a white background, and a white cotton trim (sorry I forgot to take a before picture).

I hand-wash my trim in warm water and use a bit of soap to remove the sizing which are chemicals added to the fabric to make in more rigid and to protect it from stains. This will allow the fabric to to absorb the coffee stain evenly.

Fill a small sack with lots of ground coffee. I over-do it and use about a cup... much too strong to drink! Tie it closed and throw it into a pot of boiling water. Brew it for about 10 minutes and remove the sack.


Let your fabric simmer in the pot for 10-20 minutes depending on how dark you want to stain it. Remember: Once the fabric is dried, the stain will become MUCH lighter. Remove from the pot with tongs and immerse in very cold water with some white vinegar added. At this point, immersing the fabric in hot water would remove some of the stain. Rinse in cold water.


If you don't want to ruin your ironing board, cover it with an old pillowcase or spare cotton fabric. Iron the fabric or trim by sections with a hot dry iron until it is completely dry. The stain is now set.


Here is the fabric against a white background so you can see how it has been stained. Now, I don't use coffee purely because I would rather not sacrifice any of my precious tea... I find that different types of tea will yield different tints. Orange pekoe will give a much warmer yellow-orange tint. I prefer coffee because it produces a more neutral tint. I giggle when I think that I stain my tea fabric with coffee!


Sometimes if the colour or print of the fabric is too bright or if I want a more antique look, I will even bleach the fabric a bit before staining it. The cowboy fabric in this quilt started out as a very bright orange and green print...


See more of the Mister Peanut bunny quilt that I made in 2007 here.


Enjoy your afternoon tea & quilted crafts :o)

September 19, 2008

Fabric Labels Tutorial


Many people have asked me how I make my labels so I have decided to make this little tutorial including pictures and any little tips that I have learned along the way. You will find that making your own labels is quite simple and much cheaper than purchasing custom labels. Pour yourself a cup of tea and enjoy.

Materials needed:
computer, graphics program (I used photoshop) & inkjet printer
regular printer paper
iron-on transfer paper
utility knife, cutting mat & metal ruler
ribbon (I used 1/2 inch natural cotton twill tape)
iron & ironing board
scissors


Step 1: Design your image using your program of choice working with a resolution of 300ppi for a clear image. The height of your image should be smaller than the width of your ribbon. Print some out on regular paper, cut them out and see how they fit on your ribbon. Fill up an entire page, repeating images in rows and leaving about an inch between the images in each row. The rows can be fairly close together. *Remember to reverse your image! I can get 96 labels out of one sheet of transfer paper which I think is pretty economical.


Step 2: Print your labels. Follow the transfer paper instructions to set your printer for the right type of paper. Print a test sheet on regular paper first making sure that the image is reversed. Print a sheet of labels on the transfer paper (I have decided to print a few larger labels this time for my bags).


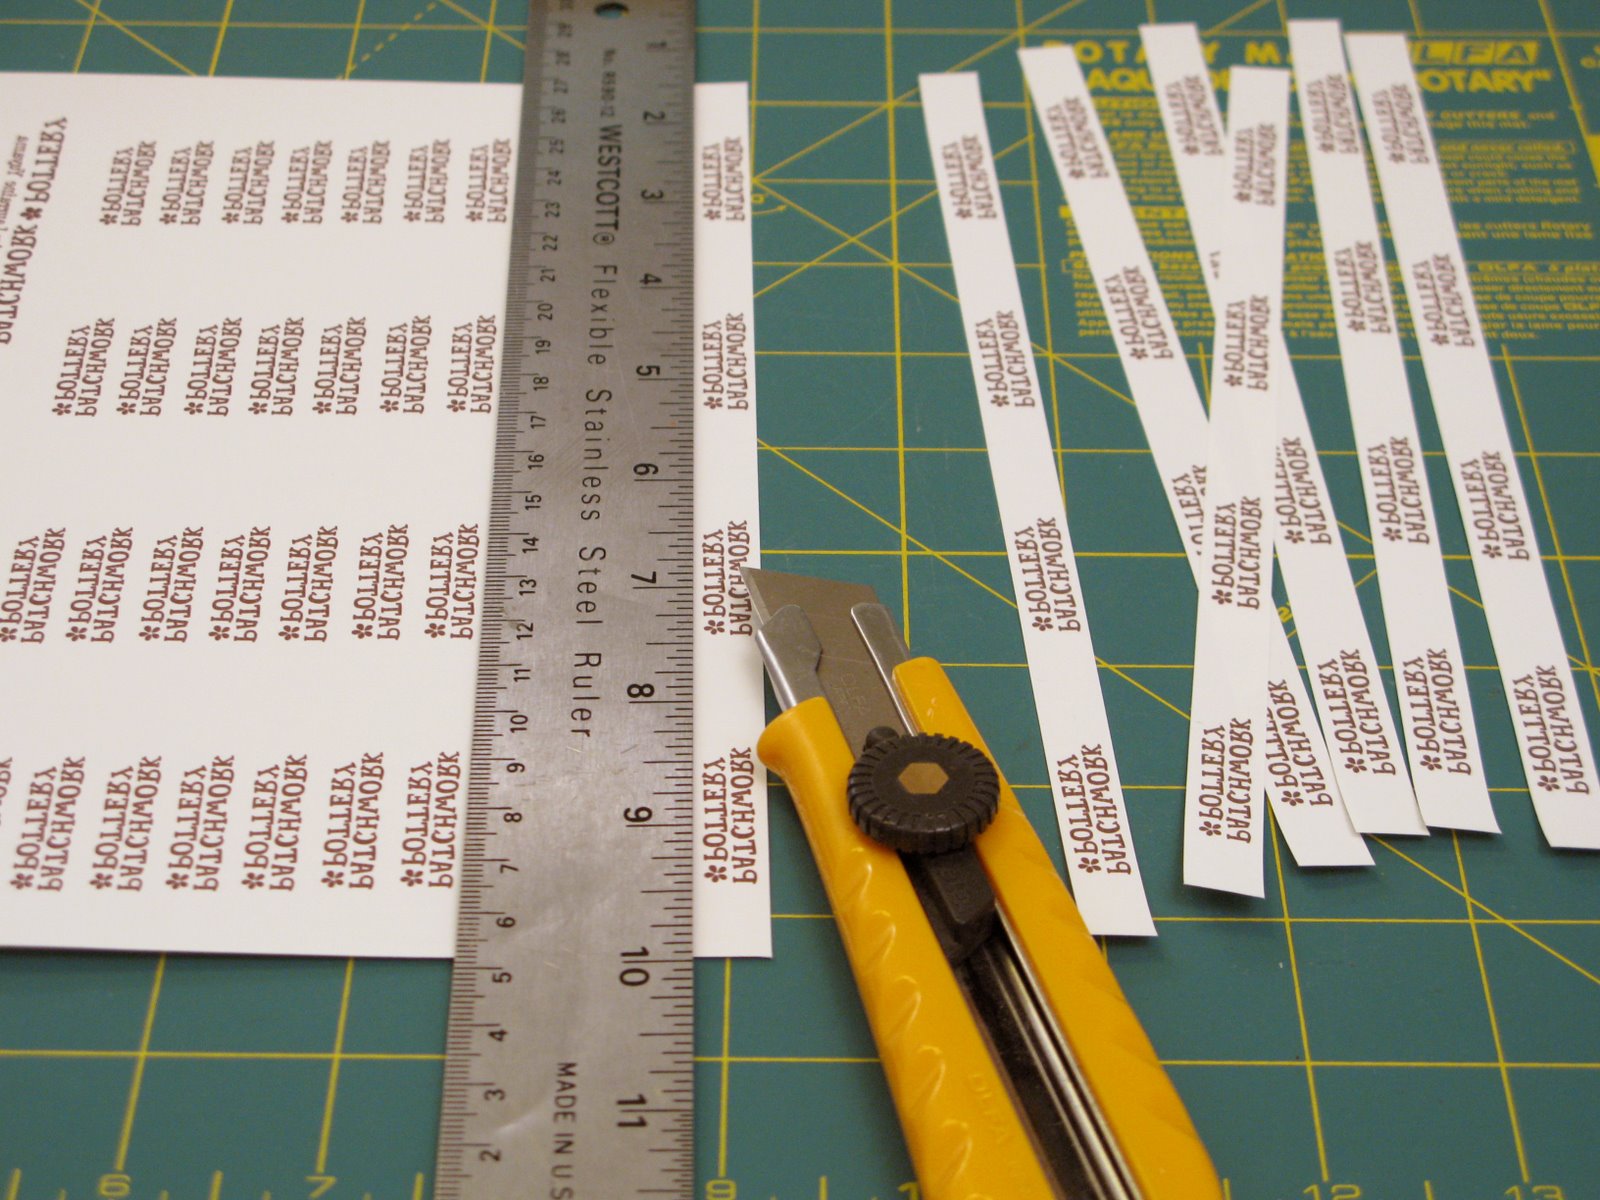
Step 3: Cut out the images preferably into long strips using your utility knife, cutting mat and ruler. Leaving them in strips will save time when ironing and you will be less likely to burn your fingertips. (I know you are not supposed to use utility knives on these mats but it's better than cutting up my new desk!)


Step 4: Iron the transfer onto the ribbon. Lay the ribbon flat. Place a strip printed side down. Press the strip down with the iron. Once it is adhered, slide the iron across several times. *Make sure the iron is not too hot. If your iron is too hot or if you iron it too long, your image will melt! See below.


Step 5: Peel off the backing paper. Wait until the twill tape has cooled before removing the paper. I always leave the previous paper strip on to protect the iron when I am adding a new strip. *The transfer will melt if the iron touches it!


Step 6: Use them! Make a whole roll of labels or cut them as desired. You can turn the ends under and stitch them to your project, or you can fold them in half and sew them into a seam to create a loop tag. Now you are ready to add them to all your wonderful creations!

You could also make laundering instruction labels, and quilt labels using this same method!

- - - - - - - - - - - - - - - - - - - - - - - -

***Additional TIP (added April 28, 2011)***
To remove most of the plastic feel of the transfer paper and to set the image even more, lay baking parchment paper over the transferred image and iron again with a hot iron. It really works!


Enjoy your afternoon tea & quilted crafts :o)