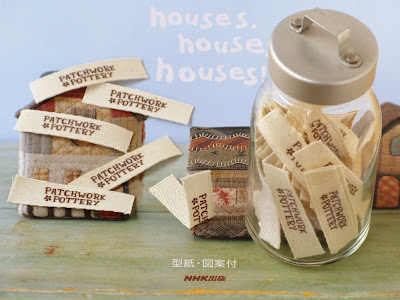
Many people have asked me how I make my labels so I have decided to make this little tutorial including pictures and any little tips that I have learned along the way. You will find that making your own labels is quite simple and much cheaper than purchasing custom labels. Pour yourself a cup of tea and enjoy.
Materials needed:
computer, graphics program (I used photoshop) & inkjet printer
regular printer paper
iron-on transfer paper
utility knife, cutting mat & metal ruler
ribbon (I used 1/2 inch natural cotton twill tape)
iron & ironing board
scissors

Step 1: Design your image using your program of choice working with a resolution of 300ppi for a clear image. The height of your image should be smaller than the width of your ribbon. Print some out on regular paper, cut them out and see how they fit on your ribbon. Fill up an entire page, repeating images in rows and leaving about an inch between the images in each row. The rows can be fairly close together. *Remember to reverse your image! I can get 96 labels out of one sheet of transfer paper which I think is pretty economical.

Step 2: Print your labels. Follow the transfer paper instructions to set your printer for the right type of paper. Print a test sheet on regular paper first making sure that the image is reversed. Print a sheet of labels on the transfer paper (I have decided to print a few larger labels this time for my bags).

Step 3: Cut out the images preferably into long strips using your utility knife, cutting mat and ruler. Leaving them in strips will save time when ironing and you will be less likely to burn your fingertips. (I know you are not supposed to use utility knives on these mats but it's better than cutting up my new desk!)

Step 4: Iron the transfer onto the ribbon. Lay the ribbon flat. Place a strip printed side down. Press the strip down with the iron. Once it is adhered, slide the iron across several times. *Make sure the iron is not too hot. If your iron is too hot or if you iron it too long, your image will melt! See below.


Step 5: Peel off the backing paper. Wait until the twill tape has cooled before removing the paper. I always leave the previous paper strip on to protect the iron when I am adding a new strip. *The transfer will melt if the iron touches it!


Step 6: Use them! Make a whole roll of labels or cut them as desired. You can turn the ends under and stitch them to your project, or you can fold them in half and sew them into a seam to create a loop tag. Now you are ready to add them to all your wonderful creations!
You could also make laundering instruction labels, and quilt labels using this same method!
- - - - - - - - - - - - - - - - - - - - - - - -
***Additional TIP (added April 28, 2011)***
To remove most of the plastic feel of the transfer paper and to set the image even more, lay baking parchment paper over the transferred image and iron again with a hot iron. It really works!


Que maravilhaaaaaaaaaaaa , eu fiz e deu muito certoooooooooo, Obrigada por compartilhar sua criatividade. Amei mesmooooooooooo
ReplyDeleteGracias,por el tutorial. No se si seré capaz de hacerlo.
ReplyDeletebss
thanks for sharing!
ReplyDeleteI simply can't find enough strong words to THANK you fot that tutorial... It's so simple and effective!
ReplyDeleteThank you SO much! I was looking all over the net to buy labels, but this is a much better idea (cheaper!).
ReplyDeleteHi Laurraine, Great tutorial..still going since 2008!! I don't know if someone asked this yet,but do you have to wash & dry the twill tape before ironing the label? Thanks, Shelley
ReplyDeletePS. I used to live in New West too. :)
The tape does not need to be washed. However it would probably help set the transfer. I have never washed mine and it seems to hold up quite well in the wash :o)
ReplyDeletewhat a genius idea! Thank you so much - I have been thinking about how to do my labels for ages and love the handmade factor :) really clear instructions too - I'll definately be back for more advice
ReplyDeleteLike everyone else who's commented - you're wonderful for sharing your method! I have Word and found this tutorial containing step-by-step screenshots: http://sometimescrafter.blogspot.com/2009/03/tutorial-easy-fabric-labels-in-word.html
ReplyDeleteMahalo nui loa (thank you very much)!
Thank you so much for the description! It was really useful and I will try it.
ReplyDeleteWith my best wishes: Maminti, the little green fairy
Great tutorial! Thank you!!!
ReplyDeletefabric instruction images you can copy for your labels are here:
ReplyDeletehttp://www.google.com/search?hl=en&biw=1504&bih=771&tbm=isch&sa=1&q=fabric+care+symbols&oq=fabric+care+symbols&aq=f&aqi=g3&aql=&gs_sm=e&gs_upl=38620l39828l0l5l4l0l0l0l1l293l898l0.2.2
Choose what's best for you. copy and paste to your label logo / name etc.
If the link doesn't work go to images in Chrome and use keywords: fabric care symbols
Good luck
I put this on my blog, and gave you credit, with a click of the mouse they would be at your site. Never did this before, so It is important to me that it's alright for you as well. Please contact me if it's not, but it's just too awesome not to get out there as much as possible.
ReplyDeleteFeatured you!
ReplyDeletehttp://allawesomelinks.blogspot.com/2011/06/how-to-make-fabric-labels.html
Just made these today and they turned out great - thanks for the wonderful tutorial! I hope you don't mind that I put a link to this post on my blog
ReplyDeletehttp://ducklyandjuicy.blogspot.com/2011/06/make-your-own-labels.html
Cheers,
Allie
I was about to order labels, but I think I'm going to try this first! Thanks so much for posting this! I wonder how it would work with printing pink text on the transfers and putting it on black or zebra ribbon? I guess I'll find out! Thanks again!
ReplyDeletegreat idea , thanks
ReplyDeleteGreat tutorial! Your labels look great. Just what I have been looking for to make my own labels. Thanks!!!
ReplyDeleteHello!!!
ReplyDeleteThanks for the tutorial.
I posted a link and a coment in my blog.
I loved!!!
xoxo
Dani
This is an amazing, yet simple tutorial. I shared it on my blog, SEW that!
ReplyDeleteThanks for the time and effort you took in creating the tutorial.
I followed your easy and it worked great. Then I washed and dried a quilt with the label and the label peeled off in areas.
ReplyDeleteI used ric rac and June Tailor Print n Press iron-on transfer paper.
Any suggestions?
Sorry, I don't. The transfer paper I used is made for T-shirts so it is best used with a smooth cotton fabric.
ReplyDeleteGreat tutorial! I've used this technique many times for labels but never figured out to leave the tags uncut, in strips until after they were ironed on! That will save some time! Sounds dumb to say it but I didn't think to print the labels out backwards either & then iron them on w/ the backing paper on. Took forever to peel all those backings off each tiny individual label!
ReplyDeleteHi!
ReplyDeleteThanks for this.
I found the right place at the right time. You are great.
http://patchworkdailydesire.blogspot.com/2011/09/i-found-right-place-when-i-needed.html
Hi Thank you for such good instruction. Was going to buy laberls but this will suit me much better. Can't wait to try it out
ReplyDeleteOh what a good idea! I almost ordered printed labels, and now I can totally control how many and what they look like! This is great. I'm trying to put a label in a handmade purse to sell on ETSY.
ReplyDeleteThank you for this helpfull tutorial. Nice pictures and good instructions.
ReplyDeleteYou're the best.
I love everything here.
Hope you don't mind but I've blogged and linked to share your beautiful, beautiful crafts.
Love your tutorial!! I'm about to download your pincushion pattern & was wondering where you buy all the cute fabrics to make them? Also which font did you use for your labels? Thank you so much for the inspiration!
ReplyDeleteHi Sharon,
ReplyDeleteThanks for visiting my blog! I use a lot of Japanese fabrics which I buy online at www.etsy.com Just search for "japanese fabric". Hope that helps :o)
Hugs & Happy Sewing!
Laurraine
Thank you for the very clear instructions and thank you for sharing with us!
ReplyDeleteKind regards, Evelyne
grazie mille! kiss kiss kiss kiss
ReplyDeleteGreat tutorial. I use a rubber stamp to stamp onto fabric-but this doesn't withstand the all mighty washing machine. This is a perfect alternative!
ReplyDeleteThanks so much for such clear instructions and lovely photos to match. I got directed here by yourself a while ago through flickr and have finally got around to making some. Will post your tutorial onto my fb page www.facebook.com/laylabobayla
ReplyDeleteI love this idea just bumped into it from some other site will be trying this out this weekend. thanks so much
ReplyDeletethanks so much for sharing! I can't wait to make my own labels now!!!)))
ReplyDeleteSweet! This looks amazing and as I can see, quite easy to make.. :D I will try this next weekend.. :) Thanks for the training.. :D
ReplyDeleteWow, das ist ja eine tolle Idee, da wär ich ja nie und nimmer drauf gekommen. Danke für die Anleitung!
ReplyDeleteLG Hexe
Thank you for the tutorial! :) I was going to order custom labels but now I don't have to! It looks simple enough to create my own labels :)
ReplyDeleteMe encanta esta idea, yo quiro usarlo para mi logotipo pero no encuentro el tranfer, mi pregunta es, tu lo vendes ? o me puedes decir donde lo puedo comprar.
ReplyDeleteGracias por todo y adelante con esas grandes ideas.
Me puedes responder a mi correo.
Atentamente Maricarmen
Jarmidaari@hotmail.com
Adorei essa sua dica e já corri pra postar no meu Blog como dica, caso haja algum problema é só me avisar..bjs!!
ReplyDeleteNatascha Fernadnes
http://nartsartesanatos.blogspot.com/
Your post was impressive and incredible. I enjoyed your post. Thank you for sharing. I will refer this to my friend. Keep sharing.
ReplyDeleteMichelle
I just take a peek and I discovered your post. I find it nice and incredible. I like it. You did a good job. Thank you for sharing.
ReplyDeleteMichelle
Love this tutorial!! Found you on pinterest!! Thank you!!
ReplyDeletePatti
Love these - after four years of dreaming about doing these I've finally got the stuff together to do it!
ReplyDeleteWow!!!! I just started making designer high end diaper bags and was on line looking to purchase labels. I couldn't find any that are suitable for my needs. YOU HAVE SAVED THE DAY!!! Thank you so much for this wonderful tip and fantastic easy to follow instructions. Have a blessed day.
ReplyDeleteIt is a very creative blog.I always learned a lot from your blogs.
ReplyDeleteAdorei este passo-a-passo. Já fiz as minhas etiquetas e publiquei um tópico no meu blog com indicação da origem. Caso haja algum problema é só avisar-me. Obrigada!!
ReplyDeletehttp://meu-recreio.blogspot.com/
Any idea why my transfer paper gets all globby when I print on it? When I test it on plain paper, it looks great. I have a laserjet printer. Do you think that makes a difference? Thanks for any tips!
ReplyDeletemuy bonito blog no me canso de verlo siempre que tengo oportunidad paso a visitarlo lo unico triste es que no se como hacerme seguidora de el si puedes decirme mi correo es victor_hgalan@hotmail.com un abrazo
ReplyDeleteI just want you to know, that I tried the labels and they are perfect! Absolutely perfect! I used some thicker ribbon because I have little bigger label, but everything turned out great! Thank you for the tutorial!
ReplyDeletegenius!!! thanks for sharing :) I'll try it for my labels> I hope that iron is not too hot
ReplyDeleteI love the internet! nearly 4 years after you posted this it was just there when I needed it! Everything I make uses upcycled materials as far as possible and I didn't want to commission labels to be made for me...now I will be able to print on vintage fabrics and keep to my principles!! Thanks for the effort you put into this. I'll now go and read some more posts and no doubt find other useful ideas! ;-)
ReplyDeleteThank you so much for sharing. This is exactly what I needed.
ReplyDeleteI've been searching for a way to add my son's name to all of his clothing and items needed for day care. The preprinted labels you can purchase online are WAY too expensive, and just a regular sharpie looks too messy for my taste! But this is perfect and easy!!! Thank you so much for the idea! I love it!
ReplyDeleteIt was a great blog ..
ReplyDeletex men cosplay
I found this on Pinterest, tried it and it worked great. I used a label template, made it quick and easy. Cut the strips with a paper cutter. Quick and easy, thank you.
ReplyDeleteThank you, I like the idea :)
ReplyDeleteWhat a great tutorial for creating own fabric labels. It is time saving, cost effective and easy to make at own work place. If you will get these labels from Services Company that they will charge about hundred of dollars which you solved with few easy steps :) thanks for sharing....
ReplyDeleteGreat post. I just stumbled upon your blog and wanted to say that I have really enjoyed browsing your blog posts.
ReplyDeleteMy young son has been making t-shirts and hats. I was looking online to price some cloth labels to surprise him with when I ran across your blog. I had him make same designer labels (he's a graphic design student). He was thrilled with the results! Thanks so much.
ReplyDeleteCarmen...New York
Love this idea. Thanks so much! Just curious are you able to wash labels or will they get ruined? Thanks
ReplyDeleteThanks, so easy. Just one question: does anyone know the UK equivalent of Baking Parchment Paper for removing the sticky residue? I tried Baking Paper but it didn't work!
ReplyDeleteJana (England)
Thank you for sharing! I love it!
ReplyDeleteCan't get your email to pop up. Could I get your permission to use one of your images from this post for my upcoming post about fabric labels? I would use your blog name and link back to this specific post.
ReplyDeleteThanks,
Stephanie
thepetitesewist.blogspot.com
thepetitesewist@gmail.com
ReplyDeleteThanks for this great tutorial. I have been wanting to make some labels for ages but did not know where to start. This makes it seem very easy :-)
Christina from feltlikesmiling.com
Great materials to use
ReplyDeletethank you so much for this idea. I make Hearts of hope pillows for breast cancer patients and this will be a better idea for the labels.
ReplyDeleteAchei incrível! Que fácil!!!
ReplyDeleteObrigada por compartilhar!
Vou me aventurar e tentar fazer!
Um abraço!
Thanks so much for your tutorial. I was planning on buying custom labels when I came across your tutorial. I then realized I had everything but the twill tape so I decided to make my own. Easy peasy!
ReplyDeleteI loved it. I did a post on my blog (http://artesdalelezynha.blogspot.com.br/2013/08/etiqueta-de-tecido.html), inspired in your tutorial. Thanks for sharing!
ReplyDeleteDoes ironing over the label AFTER it has been washed and dried melt/remove the printing?
ReplyDeleteThank you so much for this, I've been trying to find some labels for ages, now I have exactly what I want. Off to purchase the items now :)
ReplyDeleteThanks for giving this valuable information….i hope it helps for me .
ReplyDeleteExcellent tutorial. I need to try to make some labels
ReplyDeleteThank you so much for this. I wanted to label my little cats with their names. But it's also given me a way to transfer the cats' features onto the fabric to sew over, like a template.
ReplyDeleteReally well explained and useful data allaround. great job!
ReplyDeletewow thank you for you great idea,
ReplyDeletehello can you use the printer sublime or no ?
thx
I was about to purchase some of these over the internet and I eventually came across your blog. I've never thought it could be this simple. Now I'm going to do it myself. Thanks for sharing this tutorial.
ReplyDeletewow mil gracias!!! justo lo que necesitaba y mandarlos hacer me salian tan caros!!.... gracias infinitas!...
ReplyDeleteHi. Thank you. This will be a great help to my wife who's been struggling trying to get the right tag.
ReplyDeleteI wanted to check how durable the tag is when washed and ironed.
You can not iron these labels.
ReplyDeleteLove this post. The instructions are perfect. One question when you add the label, how does it fray on the ends or do you sew them under? Hope you are still reading these comments.
ReplyDeleteThank you Janis,
ReplyDeleteI usually fold my labels in half and sew them into a seam but I have also sewn them flat onto my creations. Just make sure to leave enough space between the labels when you are creating them in your program!
Hugs, L
PS I left sample photos in my reply to your post on my facebook page :o)
Hi. I'd luv to see a video tutorial. I'm pc lit, but not with Photoshop, that part I'm especially interested to see. I downloaded a free program, GimpShop, and hope to create something interesting. I'm needing labels for Crochet projects. So happy to have found your page. :)
ReplyDeletei kinda new to this branding/labeling business but i definitely will try this. no special inks or special papers right? just an A4 sheet and regular printer?
ReplyDeleteHi Sophia, You will need T-shirt transfer paper. Thank you. Laurraine
ReplyDeleteThank you for your willingness to share your knowledge.
ReplyDeleteVery beneficial. Thanks a ton!!!
ReplyDeleteCan me tell someone how to design this in photoshop?
ReplyDeleteYou can use any program you are familiar with. Perhaps Word?
DeleteThanks, I just wanted you to know this is still helping people.
ReplyDeleteThank you for sharing. I will try this today.
ReplyDeleteHo scoperto ora questo tutorial. Grandeeee!!! grazie molto utile e geniale. Grazie
ReplyDelete